Upgrade System
Has your system version been updated to the latest one?
If not, we recommend upgrading to ensure the best NASync experience.
You can choose to upgrade online or download the latest upgrade package from our official website for local installation.
Unboxing and Getting Started
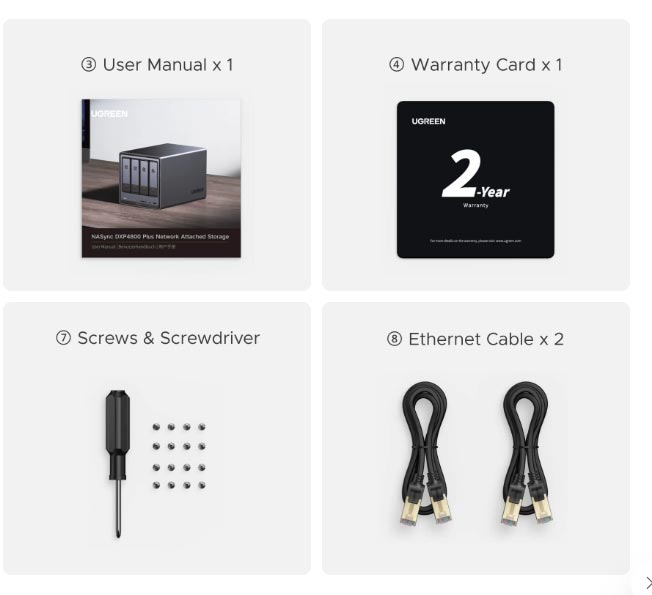
What's In the Box?
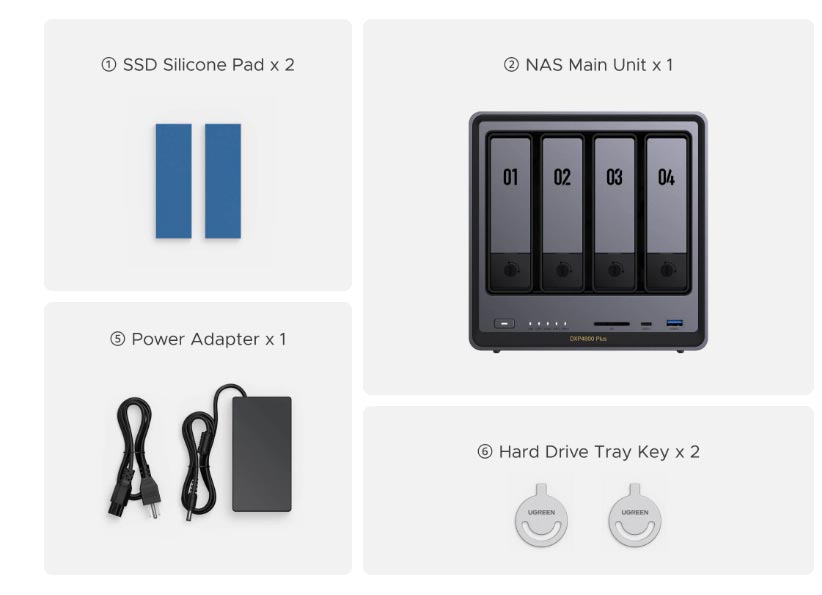
Reminder:
1. Screws and screwdriver are for installing a 2.5-inch hard drive and M.2 hard drive.
2. Do NOT plug in or unplug hard drives (including M.2 SSDs) or RAM memory or while NASync devices are on.
3. Before disassembly or assembly, please ensure the device is turned off.
4. Depending on the model, the power adapter may vary.
5. Items included in different product packages may vary; please refer to the official website for the specific product list.
Before You Start
Please note that, it is necessary to install hard drives, connect to the network, register an account, and bind your NASync device to a mobile phone, PC, tablet, or laptop.
Hard Drive Installation
1. Use the drive tray key to unlock the drive tray by inserting it into the lock hole and turning right. Press the button as the image shown below and pull out the drive tray.
2. Press on the “press” button on the back side of the drive tray and gently extend the clamp outwards. Place the hard drive into the tray. Push the clamp back, locking the hard drive into place.
3. Insert the loaded drive tray back and push it till the end. Press on the lever to secure the tray into place. Repeat this step for each drive that will be installed.
4. Using the hard drive lock key, lock the tray again by turning left.
1. Use the drive tray key to unlock the drive tray by inserting it into the lock hole and turning right. Press the button as the image shown below and pull out the drive tray.
2. On the right side of the drive tray, remove the screw at the end of the tray. Safekeep this screw as it can be reinstalled if you want to replace the 2.5-inch drive with a 3.5-inch one later on.
3. Flip the tray to its back and align the four empty screw spaces at the bottom of the 2.5-inch hard drive with the screw holes on the tray. Tighten the screws to fasten hard drive to tray.
4. Insert the loaded drive tray back and push it till the end. Press on the lever to secure the tray into place.
5. Using the hard drive lock key, lock the tray again by turning left.
Optional Installation
With M.2 hard drives used as read-write caches, the random data read and write performance of NASync devices is considerably improved. The M.2 hard drive slots are located at the bottom of the device. The M.2 slots of model DXP2800 are located at the left inside the main unit. Before installation, ensure the device is powered off.
1. Using a screwdriver, remove the screws of the bottom expansion compartment panel and remove the panel. You will be then able to see the RAM module slot.
2. Insert the RAM stick into the slot at an angle. Be sure to align the notch in the middle with the notch on the slot. Press into the slot lightly ensuring that the gold connectors are fully inserted into the slot and no longer visible. There will be a slight “clicking” sound as the RAM stick locks into place.
2. Press on the “press” button on the back side of the drive tray and gently extend the clamp outwards. Place the hard drive into the tray. Push the clamp back, locking the hard drive into place.
1. Using a screwdriver, loosen the screws of the bottom expansion compartment panel and remove the panel. You will then be able to see the RAM slot and two M.2 hard drive slots.
2. Using a screwdriver, loosen the M.2 fixing screw. Align the M.2 hard drive connectors with the slot bay, then insert the drive into the slot at a slight angle. Tighten the screws.
3. To add thermal silica gel to the M.2 drive, peel off the plastic film on the front and back of the thermal gel, then stick it to the M.2 drive.
4. Replace the panel and tighten the screws again, power on the device, then wait for LED lights on the front of the NASync device to flash white, indicating it is operating normally. Go to the “UGREEN NAS” app to set up the SSD cache.
Notes:
Before removing the M.2 hard drive, please go to the “UGREEN NAS” app to remove the SSD cache. This will prevent the drive from being used as a cache. If you remove the drive without completing the removal procedure, data may be lost.
Power & Network Connection

2. Once the device is powered on, connect it to the Internet by connecting a LAN cable to the NAS device and your router (NASync devices are not able to connect via WiFi).
Device Binding & Account Registration
Download the UGREEN NAS App
Please go to the UGREEN Official Website > Download Center to download and install the “UGREEN NAS” App.
Add a device
Ensure the NASync device and your mobile phone (or tablet) are on the same LAN network, then open the “UGREEN NAS” App. The App will automatically search for and display available NASync devices on the same LAN network. You can also add a device by scanning the QR code on the bottom of the device. Select the device you want to add, click “Register”, and your NAS device will be added successfully.

Register account
After adding the NASync device, you will be directed to the device initialization interface. Please complete the following steps:
- Give the device a name that is easy to identify and manage.
- Register a local administrator account for the device to manage it.
- Register and bind an UGREEN account. This is an optional step if you want to use additional functions like UGREEN-link and quick login. If you don’t think you need it, you can skip this step.
- Finally, select “Automatically install important updates only” (required) and “Device Analysis Improvement Plan” option (optional), and then you can start using the device.

Notes:
If the device does not undergo the initialization process, its status will be displayed as “Not Initialized”.


